This is default featured slide 1 title

Go to Blogger edit html and find these sentences.Now replace these sentences with your own descriptions.

This is default featured slide 2 title

Go to Blogger edit html and find these sentences.Now replace these sentences with your own descriptions.

This is default featured slide 3 title

Go to Blogger edit html and find these sentences.Now replace these sentences with your own descriptions.

This is default featured slide 4 title

Go to Blogger edit html and find these sentences.Now replace these sentences with your own descriptions.

This is default featured slide 5 title

Go to Blogger edit html and find these sentences.Now replace these sentences with your own descriptions.

!--Start of Tawk.to Script-->

Top 5 Paypal Alternatives-2018

The Internet has become a place for everything, the internet has also become a platform for the economy as well. With the introduction of e-commerce sites as well as other online businesses, there is a need for a trustworthy system of transferring money among parties. PayPal is a leading service that provides a facility to transfer money very easily online. It is considered to the best one out there. Yet, it has many downsides to it as well. There are a number of cons in PayPal that force users to look for PayPal alternatives. There are a number of best PayPal alternatives that offer money transfers worldwide over the internet very easily. Thus, we have collected a list of most trusted and efficient alternatives to PayPal, that you can use to transfer money online.
Top 5 PayPal Alternatives - 2016

Best 5 PayPal Alternatives List:


  1. Payoneer:

Payoneer is the best-known name after PayPal as online money transfer service. It is a worldwide supported network with no border limitations. It is widely used platform by many Freelancing services, eCommerce platform and having a global marketplace for network and also can send bulk payments. It supports over 200 countries, and 150 currencies and having cross exchange rates. Payoneer has over 3M users and 2000+ support and best in all PayPal alternatives. It offers 24×7 support.
Top 5 PayPal Alternatives - 2016

  1. Payza:

Payza is also a great alternative to PayPal offered by Yes Bank in India. You can send and receive money for shopping and business. It offers the services to send money around the world in seconds. Security is also taken care of and you do not need to worry. It supports more than 190 countries and offers great support. Payza is free to sign-up and has no usage fee.
Top 5 PayPal Alternatives - 2016

  1. Skrill:

Skrill is excellent and widely used as PayPal alternatives for businesses. It is a simple service that offers to control all online payments via a single account. Skrill is convenient, secure and safe, and Instant. They also provide various exclusives offers for their users. It works for all kind of online transactions making it a good choice. Many majors services support Skrill so it’s better to create an account.
Top 5 PayPal Alternatives - 2016

  1. Stripe:

Stripe is also great among other PayPal alternatives as it removes the need for a merchant account and a gateway. Stripe has best features including Storing cards, Handling subscriptions, and direct bank payments as well. Merchants can easily integrate payment system in their sites. It is basically used for crowdfunding purpose. They provide a complete toolkit for developers for doing commerce across various platforms.
Top 5 PayPal Alternatives - 2016

  1. Neteller:

Neteller is yet another online money transactions service known as PayPal alternative. It offers secure online shopping, money transfers, and international fund accessibility. It processes payment from various platforms including Visa, Master card, Bitcoin, Maestro and much more.  They also provide Reward points system which collects points every time we do transactions. Neteller also provides a payment system for doing easy transactions.
Top 5 PayPal Alternatives - 2016
These are some of the top best PayPal alternatives. You can select any of them according to your preference. For any other recommendations, please drop it in the comment box below. Enjoy!.

How to make $15 daily with your PC

Recently, I posted some articles about how to make money online both in dollar and BTC, and I received tons of emails, messages, and comments from my readers requesting for more explanation on the procedures, I tried to answer most of your queries but am but am pretty sure I left some queries out, so if you didn’t receive answer from me then I might have skipped or missed your message, Apologies.
How To Make $15 Daily With Your PC
Now, I have brought to you yet another better and working trick to make money online either as a student or an online enthusiast, as I promised earlier, I will be releasing different method you can make money online with, which am sure not all will work for you individually, but as much as I keep posting them, you will surely find a befitting one for yourself. Let’s go straight to the point!
With this method, you will make $15 daily, 99% assurance given and as I always do, I make sure I post a payment proof of which I received payment from them. Now follow the steps below:
Step 1:  Register on this website: Here (Get $3 Signup bonus).
Step 2: Verify your email.
Step 3: Complete a $0.25 Offer to validate your account (It’s really easy to complete).
Step 4: Go on Refer.
Step 5: Copy your link.
Step 6: Use Tor and create a new account.
Step 7: Complete a $0.25 or more offer on the new account.
Step 8: Earn.
Seems I just mention an alien word there, Tor. Yeah, if you don’t know about Tor, I will be posting about it later, but for the mean time you can use a VPN to create another account with your referral link always in Incognito mode.
After creating the account with your referral link, restart from step 3 above again, then create another accout with the new account referral link until the forth account, then stop. Now go back to the main account and use the referral link and continue the process again.
Check my first payment proof below:
How To Make $15 Daily With Your PC proof
If there is any term or explanation you don’t get from this tutorial, then drop a comment below, might not reply to mails. Enjoy!.

7 Things that Android users can do that Apple iphone can only dream of...

Android users rejoice – your phones come with a range of unique features and functions that your fruit-flavored rivals can only dream of.
Google’s Android and Apple iOS devices have become public rivals over the last few years, as consumers increasingly choose to side with one or the other. Despite the two companies actually working slightly more closely together in the last few months, it seems that the battle for smartphone hearts and minds is set to continue for a while yet – but Android fans can at least take heart from the fact that their devices can boast the following stand-out features.
7 Things Android Users Can Do That Apple iPhone Users Can Only Dream Of

  • Get More Choice In Their Device

To begin with, Android has long been viewed as the more open and inclusive system. Apple is the only company currently making devices that run iOS – and that leaves customers with less choice.
In contrast, Google’s open-source operating system is open to everyone, with manufacturers building everything from cheap phones to high-end flagship devices.
Far from being stuck in a one or two-year product cycle, Android users have a huge amount of devices to choose from to enjoy their software – and, processing power apart, many will, in fact, inter-relate and work well together, with setting up and getting running a quick and simple process.

  • Personalize Their Devices

Another well-publicized selling point for Android devices is the sheer amount of customization available. And it’s not just the wider array of hardware styles and sizes. From a software perspective, Android devices again offer much more.
Almost all leading Android manufacturers allow for the creation of customized backgrounds, lock screen images, color schemes, even the service you use to type.
Whether it’s a picture of your pet, loved one or even just a snappy picture, the ability to set your phone to your liking is a major selling point for Android owners. Many leading devices also allow users to mold and personalize how the software looks.
HTC recently added the ability to use custom stickers to represent apps – letting users transform their grid of apps into a cartoonist work of art, with each character representing a favorite Android app. Regardless of the quality of the end result, it’s undoubtedly more personal than Apple’s clinical grid of app icons.
7 Things Android Users Can Do That Apple iPhone Users Can Only Dream Of

  • Amazing Widgets

Another key part of the customization is Android’s use of widgets. Going one-step beyond apps by acting as a constant presence on your home screen (or any other screen, if you’d prefer), widgets make getting the information you need, when you need it, quick and simple. Without needing to fire up an app, users can check the weather, monitor calendar appointments for the day, or track your footsteps or other fitness information – all speedily at your fingertips.
Android devices will come with a wide number of widget options pre-installed or offer up a number of new alternatives via the Google Play app store – meaning you need never miss out on key information.
Apple did introduce its own version of widgets last year, but these are much more limited than their Android counterparts and are imprisoned within the notification area.
7 Things Android Users Can Do That Apple iPhone Users Can Only Dream Of

  • Add Extra And More Flexible Storage

Lots of us today use our phones for much more than just calls, as many Android devices now carry a camera powerful enough to take extremely detailed shots. But what if you want to quickly move and upload these pictures onto your home PC or laptop?
For iOS users, this often requires the fiddly installation of extra programs and going through several steps to ensure that the files you want are going to the right place. However, Android users are able to just plug and play their devices, thanks to the ubiquity of USB and USB-C chargers that power the majority of devices on the market today.
All that’s needed is a quick swipe down to tell the device that you want it to act as an extra drive, and you’re all set to use it as you would a regular USB stick, able to drag, copy and shift around all those precious files.
Adding extra storage space to Android devices is also far easier than Apple phones, as the former often come with support for microSD cards, which let you hold on to more of your treasured content without having to make tough decisions about what to keep or delete.
7 Things Android Users Can Do That Apple iPhone Users Can Only Dream Of

  • Multi-Tasking Via Multi-Window

With all these apps and widgets on your phone, sometimes things can get a little cluttered – especially if you don’t have a particularly big screen. Phone manufacturers have in the last few months finally woken up to the idea that multi-tasking can be done on smartphones, and for now at least, Android is leading the way.
Many of the top devices, including Samsung’s flagships, offer multi-screen views when using your device, similar to the split or quad screen experience you can have on a Windows PC, meaning you can have multiple apps in operation at the same time.
This is often hugely useful for those of us who like to work or check various news feeds on the go – but for iOS users, the function is limited to tablet devices such as the iPad, whereas smartphones are left behind.
7 Things Android Users Can Do That Apple iPhone Users Can Only Dream Of

  • Smoother Notifications

Notifications are a key part of staying on top of both your important communications and various social media feeds, so it’s often vital that they stick around where you can see them. However, for iOS users, this can often be tricky, as unlocking and relocking their device will cause lock screen notifications to disappear – meaning you could miss something crucial.
Android devices, however, will keep both their icons and notification presence until dismissed or accessed, meaning there’s no danger of missing out.

  • Free Up Space Quickly

Some of the apps you use will often download photos, videos, and other data onto your phone whilst you use them.  This is particularly true for apps that use photos and videos such as Vine, Twitter, and Instagram, which often use a lot of storage space to keep information related to these downloads.
If you have an iPhone, you can usually only get this space back by deleting and re-installing the app (unless – like Google Maps – the developer has included the option within the app itself) which can be extremely restrictive, particularly if you have a smaller capacity device.
However for Android users, these apps often include an option to simply clear the cache, quickly freeing up space that iOS versions cannot – and even if not, you can also clear the cache of an app in the Android software.

How to jailbreak iPhone using Pangu

iPhone users across the globe and on my blog should now be able to gain full access to their phone by jailbreaking it. Jailbreaking is similar to the hacking of Symbian phone and rooting of android phone. Pangu team just surprised us by releasing Pangu jailbreak for iOS 9 – iOS 9.0.2, the first jailbreak for iOS 9 and also for iPhone 6s, iPhone 6s Plus. Here’s how to jailbreak iPhone using Pangu running iOS 9, iOS 9 or iOS 9.0.2.
Use iCloud or iTunes to back up any and all personal information that you need to keep safe. The jailbreak has been reported to be working in most cases, but on the off chance something goes wrong, it’s a good idea to have an escape plan. Disable any Anti-virus programs or firewalls that could prevent Pangu from connecting to the internet.

Step By Step Procedure:

  • Download and Install the latest version of the Pangu Jailbreak.
  • Connect your device to your computer using the USB cable.
  • Enable Airplane mode
  • Disable Passcode from Settings > Touch ID & Passcode
  • Turn off “Find my iPhone” from Settings > iCloud > Find my iPhone.
  • Launch the application as an Administrator. Right Click on the Pangu.exe and select the “Run as Administrator” option.
  • Pangu will take some time to detect your device. Once that is done, click on the blue Start button.
  • Click on Already Backup to proceed to the jailbreak.
  • It will install the Pangu app with the WWDC app (Interesting!) on your iPhone, iPad or iPod touch.
  • It will reboot your device, and prompt you to enable AirPlane mode again after your device has rebooted.
  • At 75%, it will then prompt you to unlock your device, and run the Pangu app. Launch the Pangu app from the Home screen.
  • Next, it will prompt you to tap on the Accept button, to give access to the Photos app. Tap on Allow when you get a prompt on your iPhone. It is not clear why it needs access to the Photos app, we’ll update the post when we get more information.
  • Wait for the progress bar to complete. Your iPhone or iPad will reboot again.
  • Once the process is completed, the Pangu tool will tell you that your device is “Already Jailbroken”. You should see the Cydia icon on your home screen.
Don’t forget to join our Facebook Fan page, follow us on Twitter, add us to your circles on Google+, subscribe to our RSS feed or our Daily Newsletter for the latest updates. Let us know how it goes in the comments below. Like this post? Share it! Enjoy!.

Best free VPN for IPhone users

Virtual Private Network (VPN), are helpful to us in our day to day activities online, VPN helps in keeping your identity protected online, helps in unblocking regional restrictions or websites. You must have looked for the best app to protect your privacy online when browsing on your iPhone, well with good research we were able to get the best for you.

Top 10 Best FREE Unlimited VPN For iPhone 2017


  • TUNNEL BEAR: This app allows you browse the net securely from different locations. The app lets its users select locations they want or they can let the app decide on the best locations to VPN from. Tunnel bear offers 500mb data per month, the app supports different countries.

  • VPN BY SUREEASY: Using the default of the app, allows it chooses the best server location to route your traffic through. The data limit is 250mb. You can add more data limit by earning a reward, which is by completing small tasks which do not take time.

  • BETTERNET: This is the easiest to use VPN app on the app store, you have the high-quality support for any problems you might be facing. However, you can only choose from eight (8) cities in the US on the free version mode, to have access to other countries, you have to become a premium member.

  • HOTSPOT SHIELD: To use this app, you have to sign up for it, you can also skip this part. Using default, the app connects you to a US location. To get access to other countries, you have to be a premium user.

  • OPERA VPN: This app is free to use, once it is installed and VPN profile is ready you can start browsing the net safely. The app does not have lots of location to use from, but with the little you have, you are good to go. The Opera VPN has two tabs, which are the settings and stats, you can block trackers, enable/disable VPNs.

  • VPN IN TOUCH: This app is a good one, registration is compulsory, you can choose from different locations to enable data savings and others.

  • VPN PROXY BY SEED4: This app has a straight to the point interface, everything is made easy there for you to see. Creating a profile for the VPN profile is done through a website which you will have to open in the Safari browser.

  • KEEP SOLID VPN UNLIMITED: Registration is done before you can use this app, you can connect with your FACEBOOK ID, GOOGLE ID. This app works fine and can do an in-app purchase, so you can be added to benefits of paid membership.

  • VPN MASTER FREE: This app has only seven (7) locations, which is available in the free mode, you can unlock the VIP to have access to other locations which costs a little. The app connects its users to the location it deems best for stability and higher speed.
  • FREE VPN HEXA TECH: No registration required, VPN server is fast, the free version is ad supported and it does not allow you to change location.
I hope with this great choice on best free VPN for iPhone 2017, you can protect your data, stay safe and secure online.

How to free up space on Iphone

Have you ever wished for an SD card slot on your iPhone..? I know how irritating it is to run out of storage. That’s exactly why I have crafted this post on how to free up space on iPhone. Apple focuses mostly on the security aspect. So, they keep on providing no micro SD slot on iPhones. But for heavy users, it creates practical issues of running out of spaces to store their media files. From now on, you will have maximum free space on your iPhone.
Low On Storage..? Check Out Tips On How To Free up Space on iPhone

How to Free up Space on iPhone..?

I have divided this tutorial into different parts as the freeing up storage is done via different processes.

#1. Delete Apps or Media Files:

If you don’t care about your apps and media files, this is the obvious method to have more free space on your device. And, you are wasting your time to search for how to free up spaces on iPhone, I would say. I don’t mean you should delete all your apps to get rid of the storage issue. After removing all the apps, there will not be any uses for the phone. So first, you must know the data usage of apps.
Pick up your phone and go to Settings >> General >> Usage >> Manage data. You can see all the apps lined up there on the decreasing order of their data usage.
Low On Storage..? Check Out Tips On How To Free up Space on iPhone
Once you find an app of not-so-significant use tops the list, tap on the same and don’t hesitate to choose delete. In case you find music app on any of the top position, you need to understand the fact that music files are eating much space on your phone. So, delete some heavy-sized music files. Do the same for photo app as well.

#2. How to Free up Space on iPhone using iCloud..?

I know most of you don’t prefer the first method. We even value the media files more than the device itself. On such a scenario, you should follow this process. What we do here is seeking the help from Apple’s official cloud storage service, iCloud. You can avail 5GB free storage there. Up to 50GB, you have to pay $0.99 and, the cost would be $9.99 above that limit.
An option called Optimize iPhone Storage is there in your settings panel that shifts the high-resolution pictures to the cloud storage by keeping the moderate sized version on your device.
In order to access the specific service, follow Settings >> iCloud >> Photos and, you can see the same there.
How to Free up Space on iPhone using iCloud
Do you know how to free up space on iPhone with iCloud now..? You can also use other cloud storage services as well. Google Photos is a decent alternative, with 15GB free storage.

#3. Turn off Normal Photo Saving

iPhone has a dangerous trait that it saves the original version of a photo when you use the HDR feature. Even though we like to keep the optimized version only, the double-saving option steals the 2x storage. The same happens with Instagram as well. Along with the picture with filter, it keeps the regular photo.
You can turn off the option to have extra space on your device. Open Settings app and find Photos & Camera there. Scrolling down to the bottom reveals the option we want; Keep normal photo. By default, it is turned on. You have to tap on the same to turn it off.
how to free up space on iPhone 6
Now you have learned three pivotal how to free up disk space on an iPhone tips.

#4. Cease Auto-Saving Text Messages

The text messages on your iPhone kill a significant amount of space with time. As in any smartphone, you see all the messages are being saved automatically. Most probably, you don’t need a message even after a month.
how to free up space on iphone using icloud
Apple provides an option to erase text messages on the within a specific time. Go to Settings >> Messages >> Message History >> Keep Messages. There you will see the option Forever is turned on. You should switch it to a year or 30 days. I prefer the later, though.

#5. Delete Your Browser Cache

You know your internet browser saves a set of files on your device during the surfing sessions to make the process easier later. And, sometimes they occupy an even huge amount of space. First, let’s try to know how to free up space on iPhone by clearing cache on Safari.
how to free up space on iphone for update
Follow Settings >> Safari >> Clear history and website data. You can see a Delete option there. Tap on the same to erase the browser cache files created by Safari browser.
Maybe you are not a fan of Safari and, your primary browser may be Google Chrome. So first, open the app. You can see three dots on the right-top portion of the screen. Tapping on the same will return a menu with a number of options. Choose History >> Clear browsing data. That’s it.

#6. Keep a Track on the Free Storage

You have to keep a track regularly on the free space on your device before you look for how to free up space on iPhone. You can get an idea of the used and free space on both your device and, iCloud by following Settings >> General >> Storage & iCloud Usage.
how to free up space on iPhone 4 8gb

The manage storage option lets you assess the data usage of all the apps separately. You should check them on a regular basis to know which one eats most of your storage.
I hope you know how to free up space on iPhone now, don’t you..? While researching for more tips, I have found some illegitimate, try-on-your-own-risk tricks. Don’t try them! If it isn’t dangerous, there won’t have any cautions like that. So always, try legal processes with your iPhones before jailbreaking.
Feel free to share this article with your friends with iPhones. In case you have any doubts, don’t forget to drop a comment in the field down below. I will be happier to help you out.

How to secure social media accounts from hackers

We use the internet in our everyday activity. We use it in Business, Banking, Agriculture, Education, Entertainment and in many other fields. With the help of the internet, we can keep in touch with the outside world at home. Social networking sites become a way of sharing our thoughts and movements with others. So we need to secure social media account from the malicious users.
These sites also contain our personal information too. With the increase in cybercrime on the internet, The cyber crime includes social networking account information hacking, Email, online e-banking password and information getting by using page phishing and much more. So the surfing of internet become critical day to day. The social media account of celebrities and other famous persons becomes a way to get information about more and more people. If you also want to protect and secure social media account from hackers, then this article is really for you. In this article, we are going to discuss some tips to secure your online account.

Secure Social Media:


1. Always Be Aware Of Phishing pages:

Secure Social Media
Before logging to your media account you should always check the address bar of your browser and check that their spellings are correct, Some mischievous people create a duplicate page(use) and get your password. Make sure it facebook.com and not faceboook.com, twitter.com and not twittter.com.

2. Always Use A Strong and Different Password:

Here are the things to keep in mind while maintaining a password:
  • You can also provide your twitter account more security by using a secure password. You should use a password at least 8 to 10 digit long.
  • Use a unique and different password from other websites.
  • Your password should be a combination of number, special, upper, lower characters.

3. Always Logout Your Account:

Remember to log out your account when using a public or borrowed device, Sometimes you need to use your account from outside your home from a cyber cafe. Always log out your account after using so that no other user will misuse your private information. Also when you want to sell your phone, remember to log out and clear your phone memory before doing so.

4. Be Aware Of Third Party Apps:

Many third party apps use your account information. These Apps are built on the Twitter, Facebook, Instagram platform by external developers. So be careful to use such app and also try to provide the limited access to your account. So before giving your username and password be sure about this App. You can check app access in your account settings on twitter and manage the apps that can access your account.

5. Use Incognito On Public Computers:

Secure Social Media
If you are ever in a place where you have to log into your media account on a public computer or on any other device that is not yours, always open an incognito tab in the browser for logging into your account. This way, none of your information will be saved in the browser, and your account will be safe from malicious attacks or misused logins.

6. Never use BOTs:

If you have been using a bot or any client app for your Twitter, Facebook or Instagram, then this is time to call it a quit! A lot of internet users especially teenagers are now hell bent on getting massive likes, comments, followers on their various social media account to proof superiority online among their peers, by doing this, you have compromised your account details to the hand of the bad guys.

In conclusion, These are the best ways to Secure Social Media Accounts to keep your account safe and your information online in the right hands. You can never be too sure of your privacy online but taking simple steps can give you a lot of security and peace of mind. Suggestions are welcomed in comments below.

How to change your IMEI number

Hi lovely viewers and welcome to this post, I made this post because I noticed that some MTK android users still find it difficult to change Android Phone IMEI. I’m pretty sure this will work out well. Just make sure you follow the below procedure carefully.

How To Know If Your Android Phone Is An MTK Device:

Before we dive into the topic of the day, it will be very important for us to first identify what MTK stands for and what it truly mean for the benefit of those who it might sound alien to.
MTK stands for MediaTek, and MediaChange Android Phone IMEITek is a well-known chip manufacturing company based in Taiwan that mostly outsources their products, hence they are regarded as Fabless companies. So, phones like Tecno, Infinix, Gionee and other most Chinese phone are MTK Devices.

Change Android Phone IMEI

Now to get it done follow the prescriptions below:-
  • Download MTK Engineering Mode here.
  • Open the application and click on MTK settings.
  • Navigate to the right to “CONNECTIVITY”.
  • Select CDS information, and then radio information.
  • Now select either Phone 1 or Phone 2 depending on the sim IMEI you are willing to tweak.
  • Click on the AT+, about 4-6 option would pop-out, just choose either of the options below:
SIM 1:- AT+EGMR=1,7,” ”
SIM 2:- AT+EGMR=1,10,” “
  • Put the IMEI you wish to tweak in-between the two quotation marks “3507691********”.
  • Put a space between AT+ and EGMR.
  • Make sure there is no space between the quotation marks and the IMEI number. “3507691********”.
  • Now, click on the “send AT command” option.
After following all the above steps switch off your android phone and switch it on again. You have successfully change your android phone IMEI.
Hope this information helps. If it works for you don’t forget to COMMENT here and remember to hit the SHARE buttons for the benefit of others. Enjoy!.

Download Torrent files Via IDM

So guys, Today we are sharing a few methods to download torrent files with IDM easily. Most of you must be aware of the fact that IDM or Internet Download Manager as you know is best download client for Windows. It can increase your downloading speed by splitting your file into multiple parts. On the other hand, torrent is one of the easiest ways to download your favorite files easily but they are pretty slow. All torrent clients like uTorrent, BitTorrent are not as good as IDM. So today, I am going to share some of the best ways to download your favorite files via IDM.
In many conditions, it’s almost impossible to download torrent files due to a low number of seeds & peers. In such cases, Torrent To IDM Converter works like charm. So in this post, I will list some of the best services which host torrent files on their server and provide you high-speed direct link.
How to Download Torrent Files with IDM (Torrent to IDM)

What is Torrent..?

Torrent is a special file which contains special meta information like File Name, Size and it’s location. Note that these files don’t contain the file which you want to download. It is used to distribute files and folders easily via the internet. To download files from a .torrent file, you need to have some special torrent clients like uTorrent, BitTorrent etc. You can read more about torrent files on Wikipedia.

1. Zbigz

Zbigz is undoubtedly best torrent caching site which you can use currently. There are two versions of Zbigz. First one is free and Second one is paid which requires paid premium account. Though, Zbigz premium account is available on our site for free which you can get from here. In other words, you can say that downloading torrent files with IDM is easy by Zbigz or you can say it is easiest torrent to IDM method.
How to Download Torrent Files with IDM (Torrent to IDM)
Steps to use Zbigz to get the direct download link of torrent:
First of all, You have to download torrent file which you want to download with IDM. You can check out the list of best torrent sites here.
  1. After getting your torrent file, Now open zbigz.com.
  2. Sign up for a free account or get the premium account of Zbigz.
  3. Now, Click on Upload .torrent file and Select your torrent file and Click on Go.
  4. Now, Wait some time till caching of your files get completed.
  5. After caching is totally completed, Click on Transfer button.
  6. Done! Your torrent file will get downloaded in IDM.

2. Bytebx

ByteBX is one of another best torrent to IDM site from where you can download your favorite file in Torrent. Similar to Zbigz, this site also has similar versions for its users. You have to buy premium account of ByteBX to enjoy it fully.download torrent files with IDM
How to Download Torrent Files with IDM (Torrent to IDM)
Steps to use ByteBX to download a torrent file in IDM:
  1. First of all, Visit bytebx.com from below button.
  2. Sign up for free or premium account, according to your needs.
  3. Just Upload the torrent file of your favourite file of which you want the direct download link.
  4. Wait for ByteBX until caching is completed and It will provide you the direct download link of the torrent file.
  5. Enjoy high-speed torrent downloads in IDM.

3. Boxopus

Boxopus is one of the best torrent caching sites which uploads your torrent files on their private servers which provide high-speed downloads. The best part of this torrent caching site is that it provides all its services for free unlike to other torrent caching sites like Zbigz , ByteBX.
How to Download Torrent Files with IDM (Torrent to IDM)
The method of Torrents to IDM through Boxopus:
  1. First of all, Open Boxopus.com from below button.
  2. Sign up for an account using your e-mail. (You can sign in your Facebook account as well).
  3. Just, upload your torrent file on this site and Wait till cache gets completed.
  4. After, when caching is completed. Simply, Download your torrent file in IDM. i.e – torrent to IDM.

4. Putdrive

PutDrive also provides you the direct download link of the torrent file. But, it has some limitations like you can not download a file whose size is larger than 10 GB. But, users who want to download their favorite movies, songs which are of small size can use this site without any kind of problem for a torrent to IDM.
How to Download Torrent Files with IDM (Torrent to IDM)
Methods of Download torrent with IDM by PutDrive:
  1. First of all, Open PutDrive.com from below button.
  2. Register for a free account there.
  3. Upload your favorite torrent file and Wait till caching gets completed.
  4. Once, caching of the file is completed, You can download the torrent file at high speed in IDM. (Torrent to IDM).

5. Torrent Handler

Torrent Handler is one of the best torrent caching sites which downloads your torrent file on their servers first and then, It will provide you the high-speed download link of your torrent file which you want to download by IDM.
How to Download Torrent Files with IDM (Torrent to IDM)
Methods to download torrent by IDM:
  1. First of all, Open Torrent Handler from below button.
  2. Click on Sign Up.
  3. Register for a new account there.
  4. Once, you have successfully registered for an account at Torrent Handler.
  5. Login into that account.
  6. Enter Torrent or Magnet URL in the form & Click on Download.


Conclusion:

So, it was all about how to download a torrent file in IDM (torrent to IDM). We have shared all best torrent caching sites which you can use for free. I hope you got the answer to your questions on how to download a torrent file using IDM. If you liked this post, then Don’t forget to share it with your friends. Do, you use any other torrent caching site for free? We would like to listen below in comments.

Top Torrent Sites

             Top Torrent Sites 


This is a list of the top torrent sites in according to their size and relevance. This list would always be updated with new torrent sites.

The Pirate BayThis site is a classic! TPB It has been around in one incarnation or another for a long time and the torrents are and have always been, trusted here.
RARBGThis torrent site is for P2P enthusiasts. It’s full of quality, high-resolution torrents. It’s about quality here, not quantity.
1337XIf you’re after older or more obscure torrents, 1337X might be for you. Their torrent database isn’t nearly as large as some others, but it might have just what you’re after.
LimeTorrentsThis is another torrent site you don’t want to skip in your search. Users love the size of their database and the frequency of legitimate files.
TorrentDownloadsWe love the super straightforward torrent detail page at TorrentDownloads. That would be reason enough to give this one a try but the big database and high quality of torrents make it a great choice.
DemonoidThe Demonoid site has been serving up torrents since 2003 as a number of different domains. This is a private membership community so you’ll need an invite to join.
IsoHuntAlso beginning in 2003, IsoHunt has gone through a lot of changes but even in its newest incarnation, is a very popular torrent search engine.
YTS.AGFrequently wrote off as a TIFY/YTS impersonator soon after launch, most users find YTS.AG torrents to be high quality and legit.
Torrentz2This is like a super torrent index, searching for torrents across dozens of other torrent sites. You can see the complete list in their sites in our index page.
KATThis super popular torrent site is formally referred to as “Kickass Torrents” and lives across various mirror sites.
TorrentProjectTorrentProject has around 10 million torrents indexed and is an often cited favorite.
TorrentFunkThis is a pretty popular torrent site, in no small part due to its “verified” status indication, as well as user comments.
TorlockThis is the “no fake torrent” site you’ve been waiting for. The site actually pays its users $1 per fake torrent they find.
EZTVYou won’t find every torrent you’re after here, but users say the quality of the torrents you do find is consistently good.
WorldWide TorrentsSet aside the aggressive splash screen on WWT’s home page, this torrent index is worth a look.
Sky TorrentsWith a huge database and pretty clean interface, it’s no wonder this multi-million strong collection of torrents is one we frequently hear about.
BTSceneA clean interface and relative lack of annoying advertising make BTScene one of our favorites.
Torrents.meThis meta torrent site isn’t too special among all the others but we love the amazing dashboard on their home page. If you’re a data nerd and a torrent fan, you’ll appreciate what they’ve done.
iDopeThe iDope torrent site is worth mentioning if only for its innovative iDope Android app. P2P file sharing right from your smartphone or tablet!
YourBittorrentThe clean interface is a big reason to try this torrent searcher… especially if you’re new to BitTorrent.
MonovaA nice, clean design is reason enough to spend time here. Advertising can be an issue at times but if you can get over that, it’s a great torrent site.
ToorgleThis is another “meta” torrent search engine, pulling in the databases from over 450 torrent sites into one place.
SeedpeerWith a sizable database of torrents, Seedpeer is and always has been a great place to search. The interface isn’t as nice as some others, but it’s still a very usable site.

How To Protect External Hard Disk Drives With Password

How To Protect External Hard Disk Drives With Password

Time to protect your external Hard Drive with encryption for securing your data from unauthorized access. We are going to share two methods that will help you protect your External Hard Disk Drives with the password. Go through the post to know about it.
Security is always the first priority for every user and when it’s about some personal data then it becomes more important. If we talk about external hard drive disk where you store lots of personal data is not at all secure, because anyone can carry your portable drive and can do some illegal act. However, it can be password protected, you can set your desired password to unlock the external drive on any computer. So have a look at complete guide discussed below to protect your external drive with a security password.
We have mentioned two methods below, one is based on system settings that will allow you to lock your drive with password without any need of third party tool. Whereas, the other one requires a third party tool to password-protect your drives. Just follow up some simple steps below to proceed.

Steps To Secure Your External Hard Drive With BitLocker:

Step 1. First of all, connect your external hard drive to your Windows PC and turn it on. Now click on Start button and then navigate to Control Panel -> BitLocker Drive Encryption.
Secure Your External Hard Drive With BitLocker
Step 2. By default, BitLocker will be “Off” you need to Turn On BitLocker for the drive that you want to encrypt.
Secure Your External Hard Drive With BitLocker
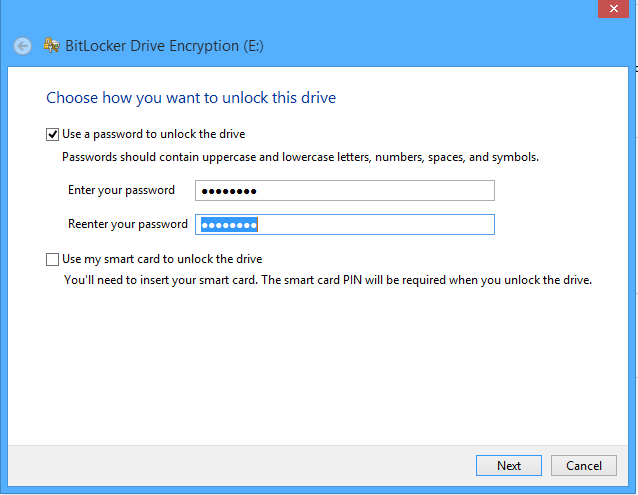
Step 3. Now their tick on “Use a Password to Unlock the Drive” option there and enter the same password in both fields and then click “Next“.
Secure Your External Hard Drive With BitLocker
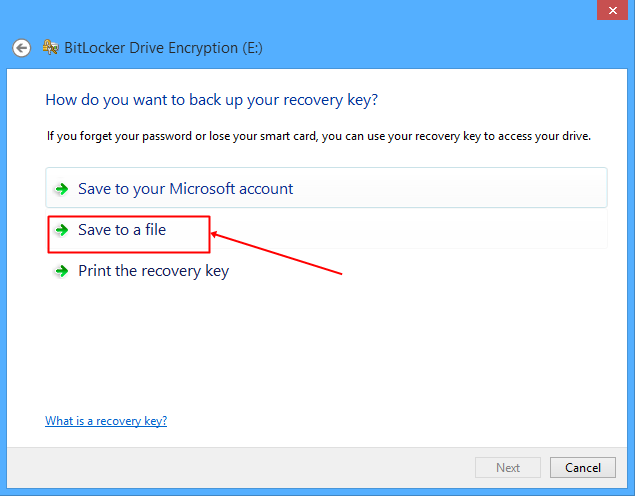
Step 4. Now time to save your key somewhere for that click on “Save the Recovery Key to a File,” and then select any location where you want to save your key for future reference and then proceed by clicking on next button.
Secure Your External Hard Drive With BitLocker
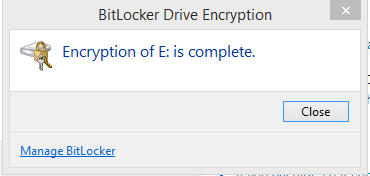
Step 5. Now click on Start Encryption option and wait for the process to complete and it can take a time to complete depending on drive size. Once finished.
Secure Your External Hard Drive With BitLocker
That’s it! you are done, now you drive will always a require a password to access files inside it.

Steps To Password Protect Your External Drive With StorageCrypt

Step 1. First of all in your windows PC download and install the tool StorageCrypt. Now launch the tool and then connect your drive to PC.
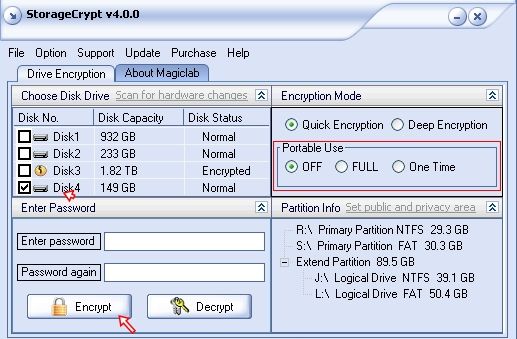
Step 2. Now in the tool, select your device to encrypt with password. Now select quick mode and then protect your drive with your desired password and then click on  “encrypt”
Password Protect Your External Drive With StorageCrypt
That’s it! you are done, now your drive will always a require a password to access files inside it.

Using Other Softwares:

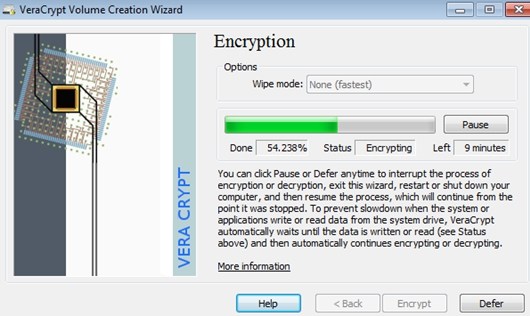
Veracrypt

Veracrypt
VeraCrypt adds enhanced security to the algorithms used for system and partitions encryption making it immune to new developments in brute-force attacks. It can encrypt your external hard disk and can even encrypt your windows partitions.

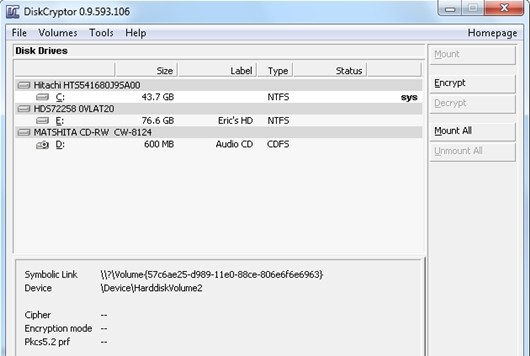
DiskCryptor

DiskCryptor
DiskCryptor is an open encryption solution that offers encryption of all disk partitions, including the system partition. The fact of openness goes in sharp contrast with the current situation, where most of the software with comparable functionality is completely proprietary, which makes it unacceptable to use for protection of confidential data.

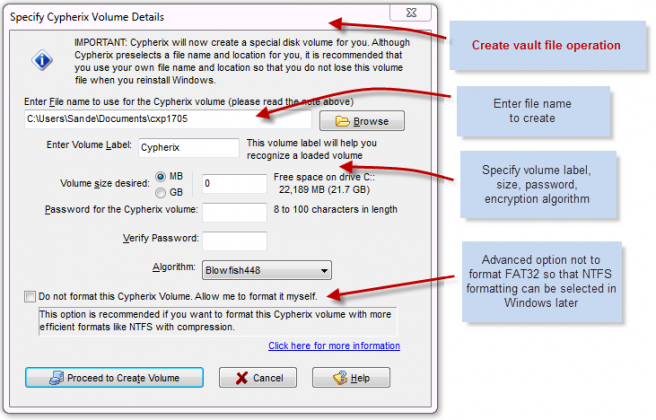
Cryptainer LE

Cryptainer LE
Free Encryption Software to protect your confidential data on Any Windows PC, Desktop, Laptop, Hard Disk or Removable Drive such as USB Flash Drive, Memory Stick. Cryptainer allows you to password protect and secure any file or folder on any media, including removable drives (Flash Drives, External hard disk, CD ROM’s etc.)

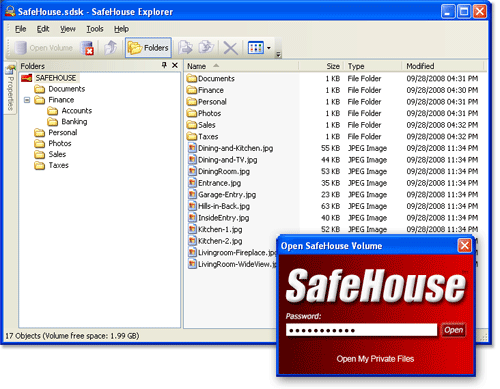
SafeHouse Explorer

SafeHouse Explorer
SafeHouse Explorer can protect files residing on any drive, including memory sticks, external USB drives, network servers, CD/DVDs and even iPods. SafeHouse Explorer uses passwords and maximum-strength 256-bit advanced encryption to completely hide and defend your sensitive files.

File Secure

File Secure
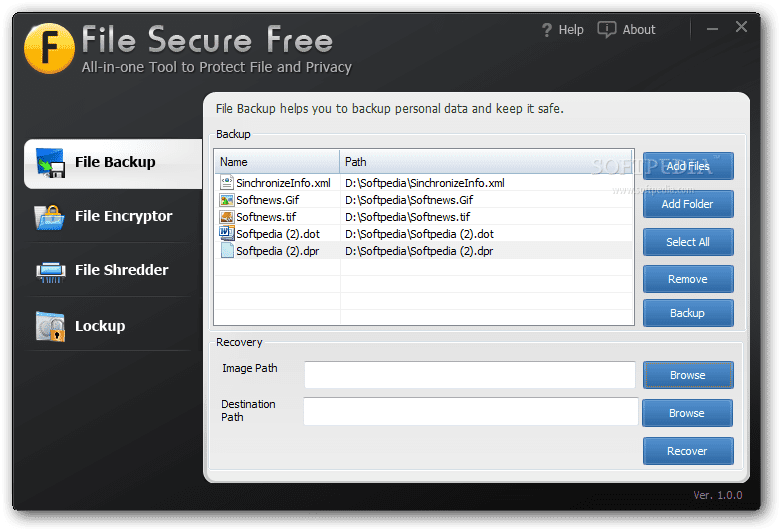
File Secure free is another best software which let you protect your external hard disk with the password. You can use File Secure free to lock your sensitive files with a solid password which will restrict other users from accessing without the password.
File secure uses AES encryption algorithm of the military standard to password protect your external drives like a hard drive, flash drive etc.

AxCrypt

AxCrypt
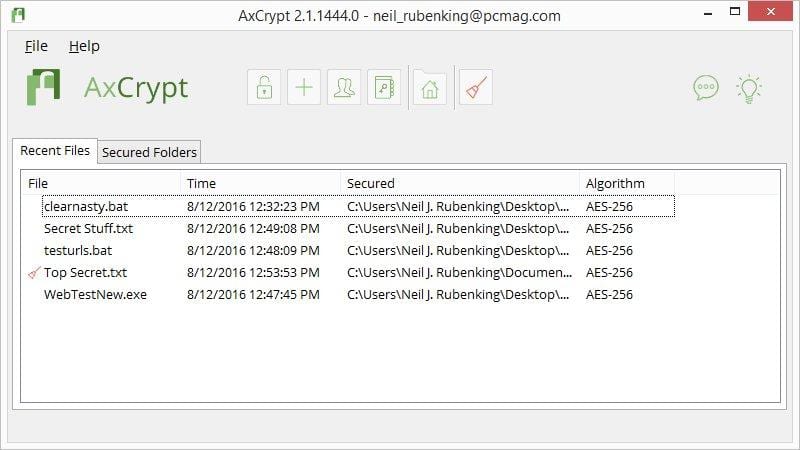
If you are looking for a trustable open source file encryption tool, then nothing can beat AxCrypt. This is one of the leading encryption software which you can use on Windows operating system to protect your USB drives or external hard drives with the password.
The software comes for free and it provides one of the easiest ways to encrypt individual files in Windows operating system. Axcrypt also has some advanced feature which integrates seamlessly with Windows.