How To Fix/Repair Windows Registry Errors
You can solve the registry errors on your Windows by different ways and all the ways that you can try are given below:
Backup:
The reason why I put this method on the top is that if you have ever encountered a particularly irksome piece of malware or virus affecting your registry then you will always have a backup at the time. So, all you need to is make a backup of your registry fields so that you can use it later.
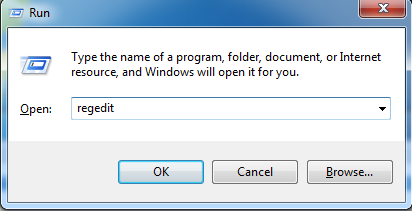
Step 1. First of all, press Windows+R. This will open the run box and there you need to type “regedit” and then simply press enter.
Fix/Repair Windows Registry Errors
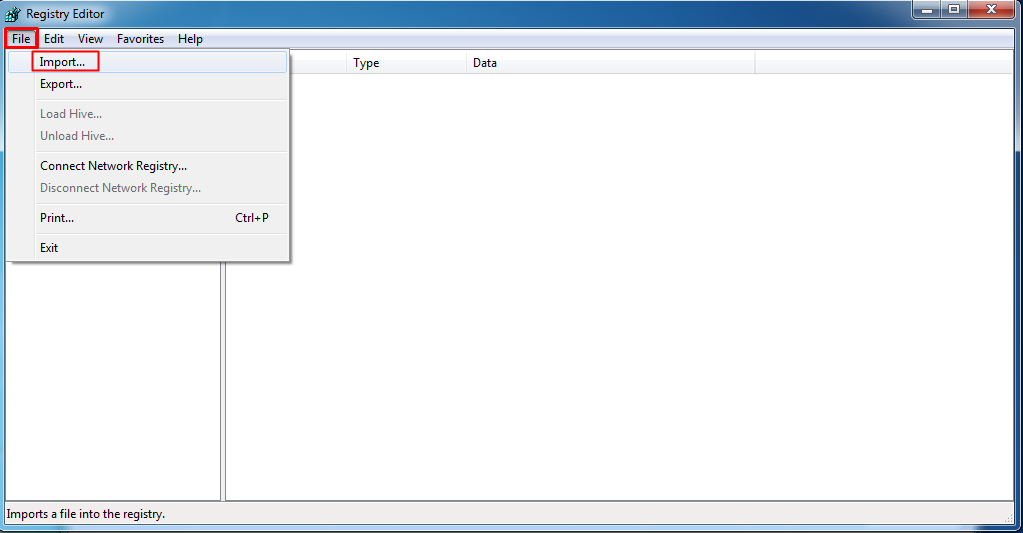
Step 2. Now from there, you need to click on “File” and then click on “Export”
Fix/Repair Windows Registry Errors
Step 3. Now a dialogue box will pop-up and you need to enter a name of your choice and store it in a safe location.
Fix/Repair Windows Registry Errors
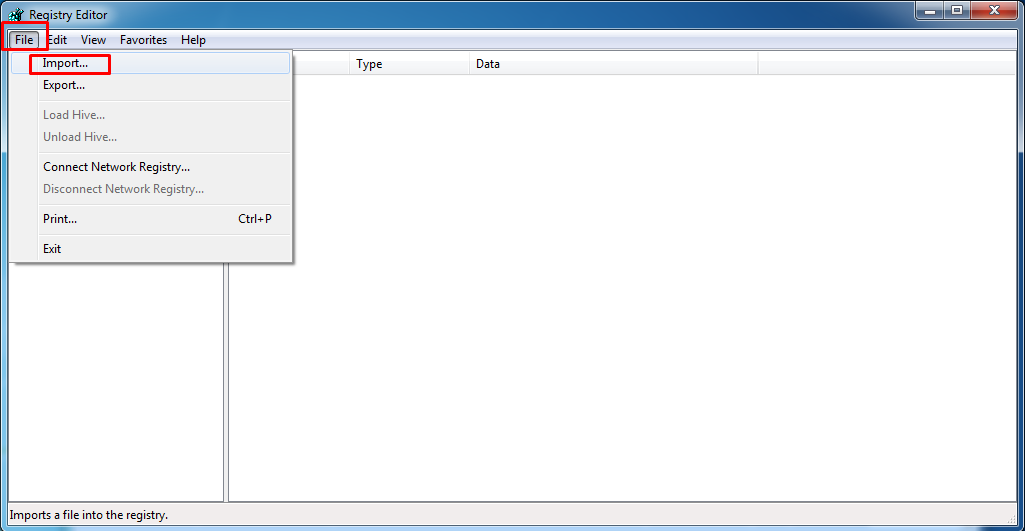
Import:
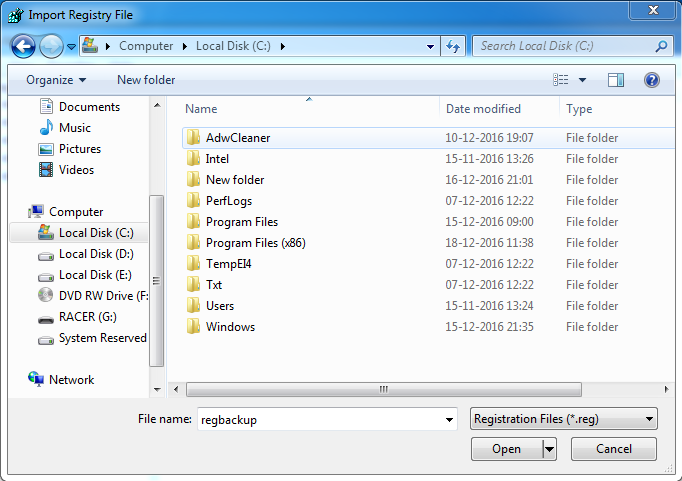
Simply follow the same steps mentioned above. Select File>Import and there browse to the location where you saved the backup file and hit “Open”. That’s it! this is the easiest way to avoid registry errors.

Fix/Repair Windows Registry Errors
#1 Using System Restore
You would be knowing about the system restore feature of the Windows in which you first create the backup of your Windows when it is working fine and then you can restore it to the same settings in the future. Here you have to do the same and restore your system to the point when it was working fine and was not having any registry issue. This will also restore the registry to the previous point, hence solves the errors related to it. Below are the steps how you can restore your system while you are using Windows.
Step 1. First of all, open the control panel on your Windows. Here in the control panel, search for the ‘System Restore’ option and click it.

Using System Restore
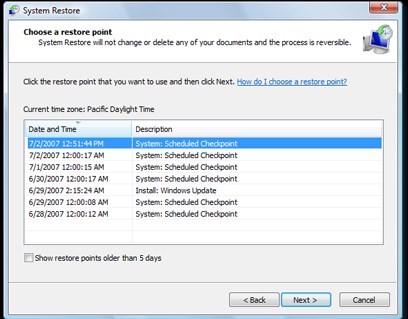
Step 2. This will open the System Restore panel. If you had created the backup for your system before, you will see that backup in the ‘System Restore‘ panel. Select the restore point from there.
Using System Restore
Step 3. After selecting the restore point, click on the “Scan for the affected programs” button on the System Restore panel. This will start the scanning of the restore point for affected programs. If there are no affected programs found on the selected restore point then you can go ahead and restore your computer to that point by clicking “Next” and then “Finish” button that appears on the panel
Using SFC Command
Well, SFC Command on Windows operating system can not only fix your corrupted Windows registry, but it can also help you in troubleshooting a buggy Windows system. The command scans and replaces files that are corrupt, missing and changed. Here’s how you can use SFC Command to fix Windows registry related problems.
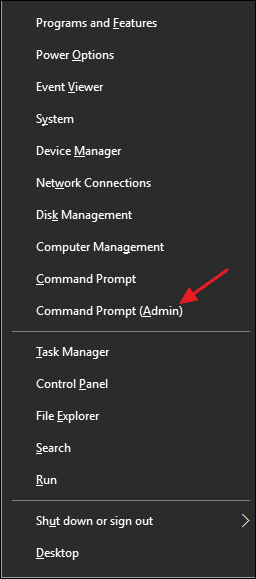
Step 1. First of all, you need to open Command Prompt with administrative rights. For that, you need to right-click on the Start button and then select the option ‘Command Prompt (Admin)’
Using SFC Command
Step 2. After that, you need to enter the run command ‘sfc /scannow‘ without the quotes as shown in the screenshot below.
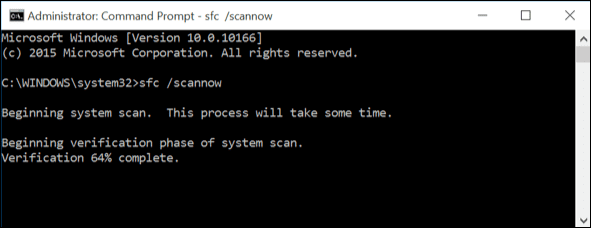
Using SFC Command
Step 3. Now, wait for few minutes until the command completes the scanning and repairing process. Once done, leave the command prompt and restart your computer.
Step 4. If you find an error report ‘Windows Resource Protection found corrupt files but was unable to fix some of them”, then you need torestart your PC in safe mode and then run the command.

Using SFC Command
That’s it, you are done! This is how you can fix registry or corrupted files on your Windows computer by using sfc /scannow command.
#2 Using Software
#1 CCleaner
There is some software available in the market that you can use to solve the errors related to the registry. These software work by restoring the registry to the previous point where it worked fine. This software can also use the information from the internet to update your registry it also finds the issues with your registry and then tries to fix them, all you have to run through some of the options within this software and you shall get the errors removed. One of the best software that you can also use to solve registry problems is
CCleaner. This software has particular options inside to work with the registry of the computer on which you have installed it. You can
Download & Install the CCleaner from here.
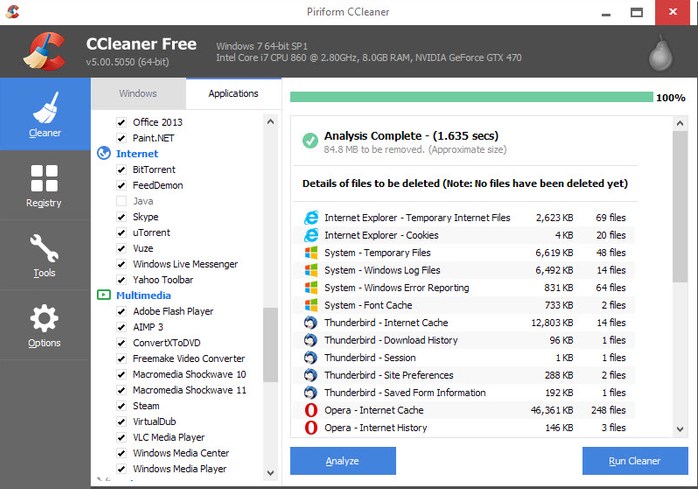
You can also fix your computer for Windows errors by cleaning it. Just clean the trash and junk files from your system and it shall fix the errors. For cleaning the system, you can again use the CCleaner software on your computer.
#2 Registry Repair
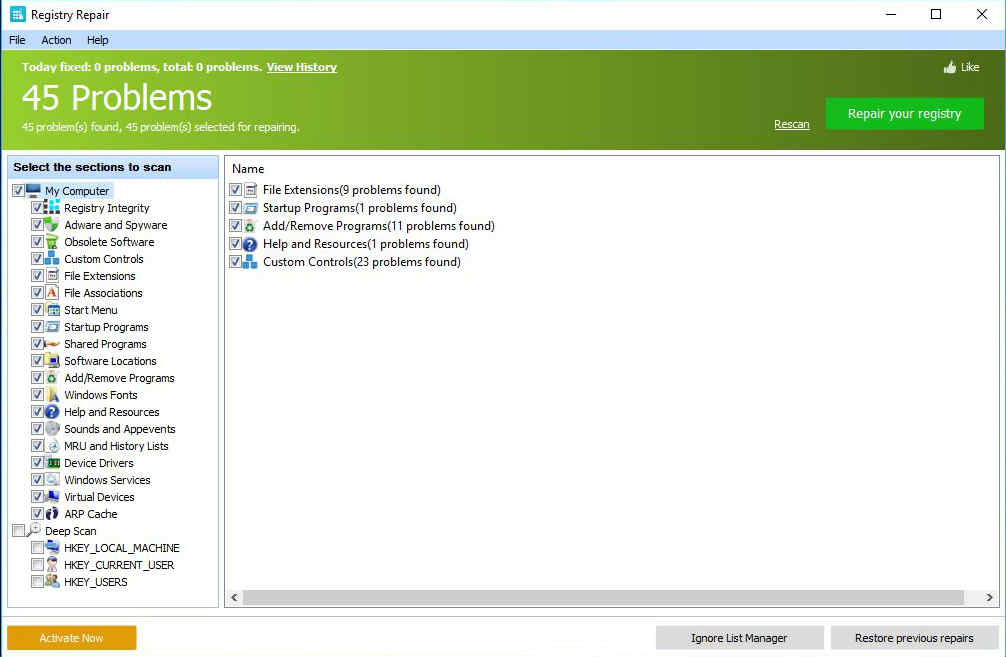
Registry Repair
Registry Repair analyzes more than a dozen of different areas in your registry and can identify up to 18 types of errors. It can also thoroughly scans the Windows registry for errors, invalid entries, Regedit optimization, etc.
It automatically scans for registry errors and fixes it for you. This also provides an option to backup the previous registry settings to avoid any problem.
#3 Auslogics Registry Cleaner
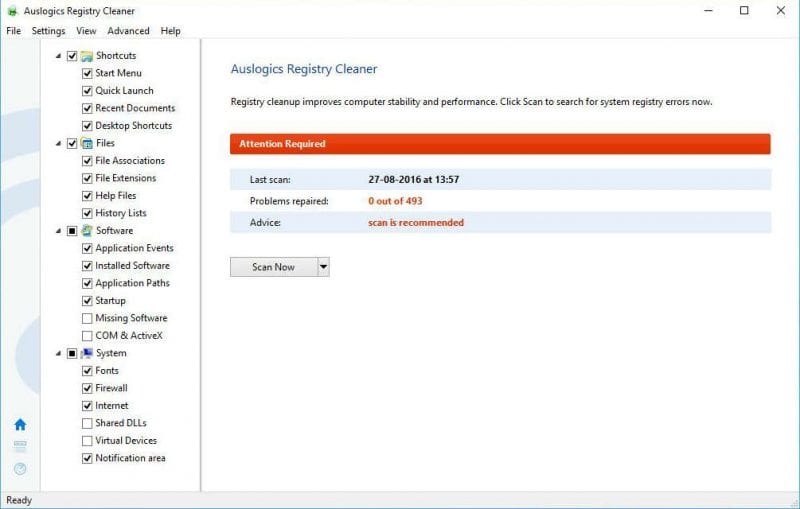
Auslogics Registry Cleaner
Auslogics Registry Cleaner is a great tool for repairing your Windows registry and dealing with stability issues, but there may be problems on your PC that are caused by other factors, such as junk accumulations, incorrect system or internet settings and similar.